Microsoft Entra SSO
An IT professional’s guide to setting up SSO with your school’s Microsoft instance.
Students and teachers can login to Cura with their Microsoft username and password.
Step 1:
Go to the Microsoft Entra admin center
Click Applications > App registration
Click + New registration.
Step 2:
Add a name, e.g. Cura SSO.
Select Accounts in this organizational directory only (Single tenant)
Click Register
Step 3:
Once registered, note down the Application (client) ID, and Directory (tenant) ID.
Please send these, along with the details for a test account, to the Cura team at support@curaeducation.com, so we can complete the SSO setup.
Then, click on Add a Redirect URL.
Step 4:
Click Add a platform, then select Single-page application (SPA)
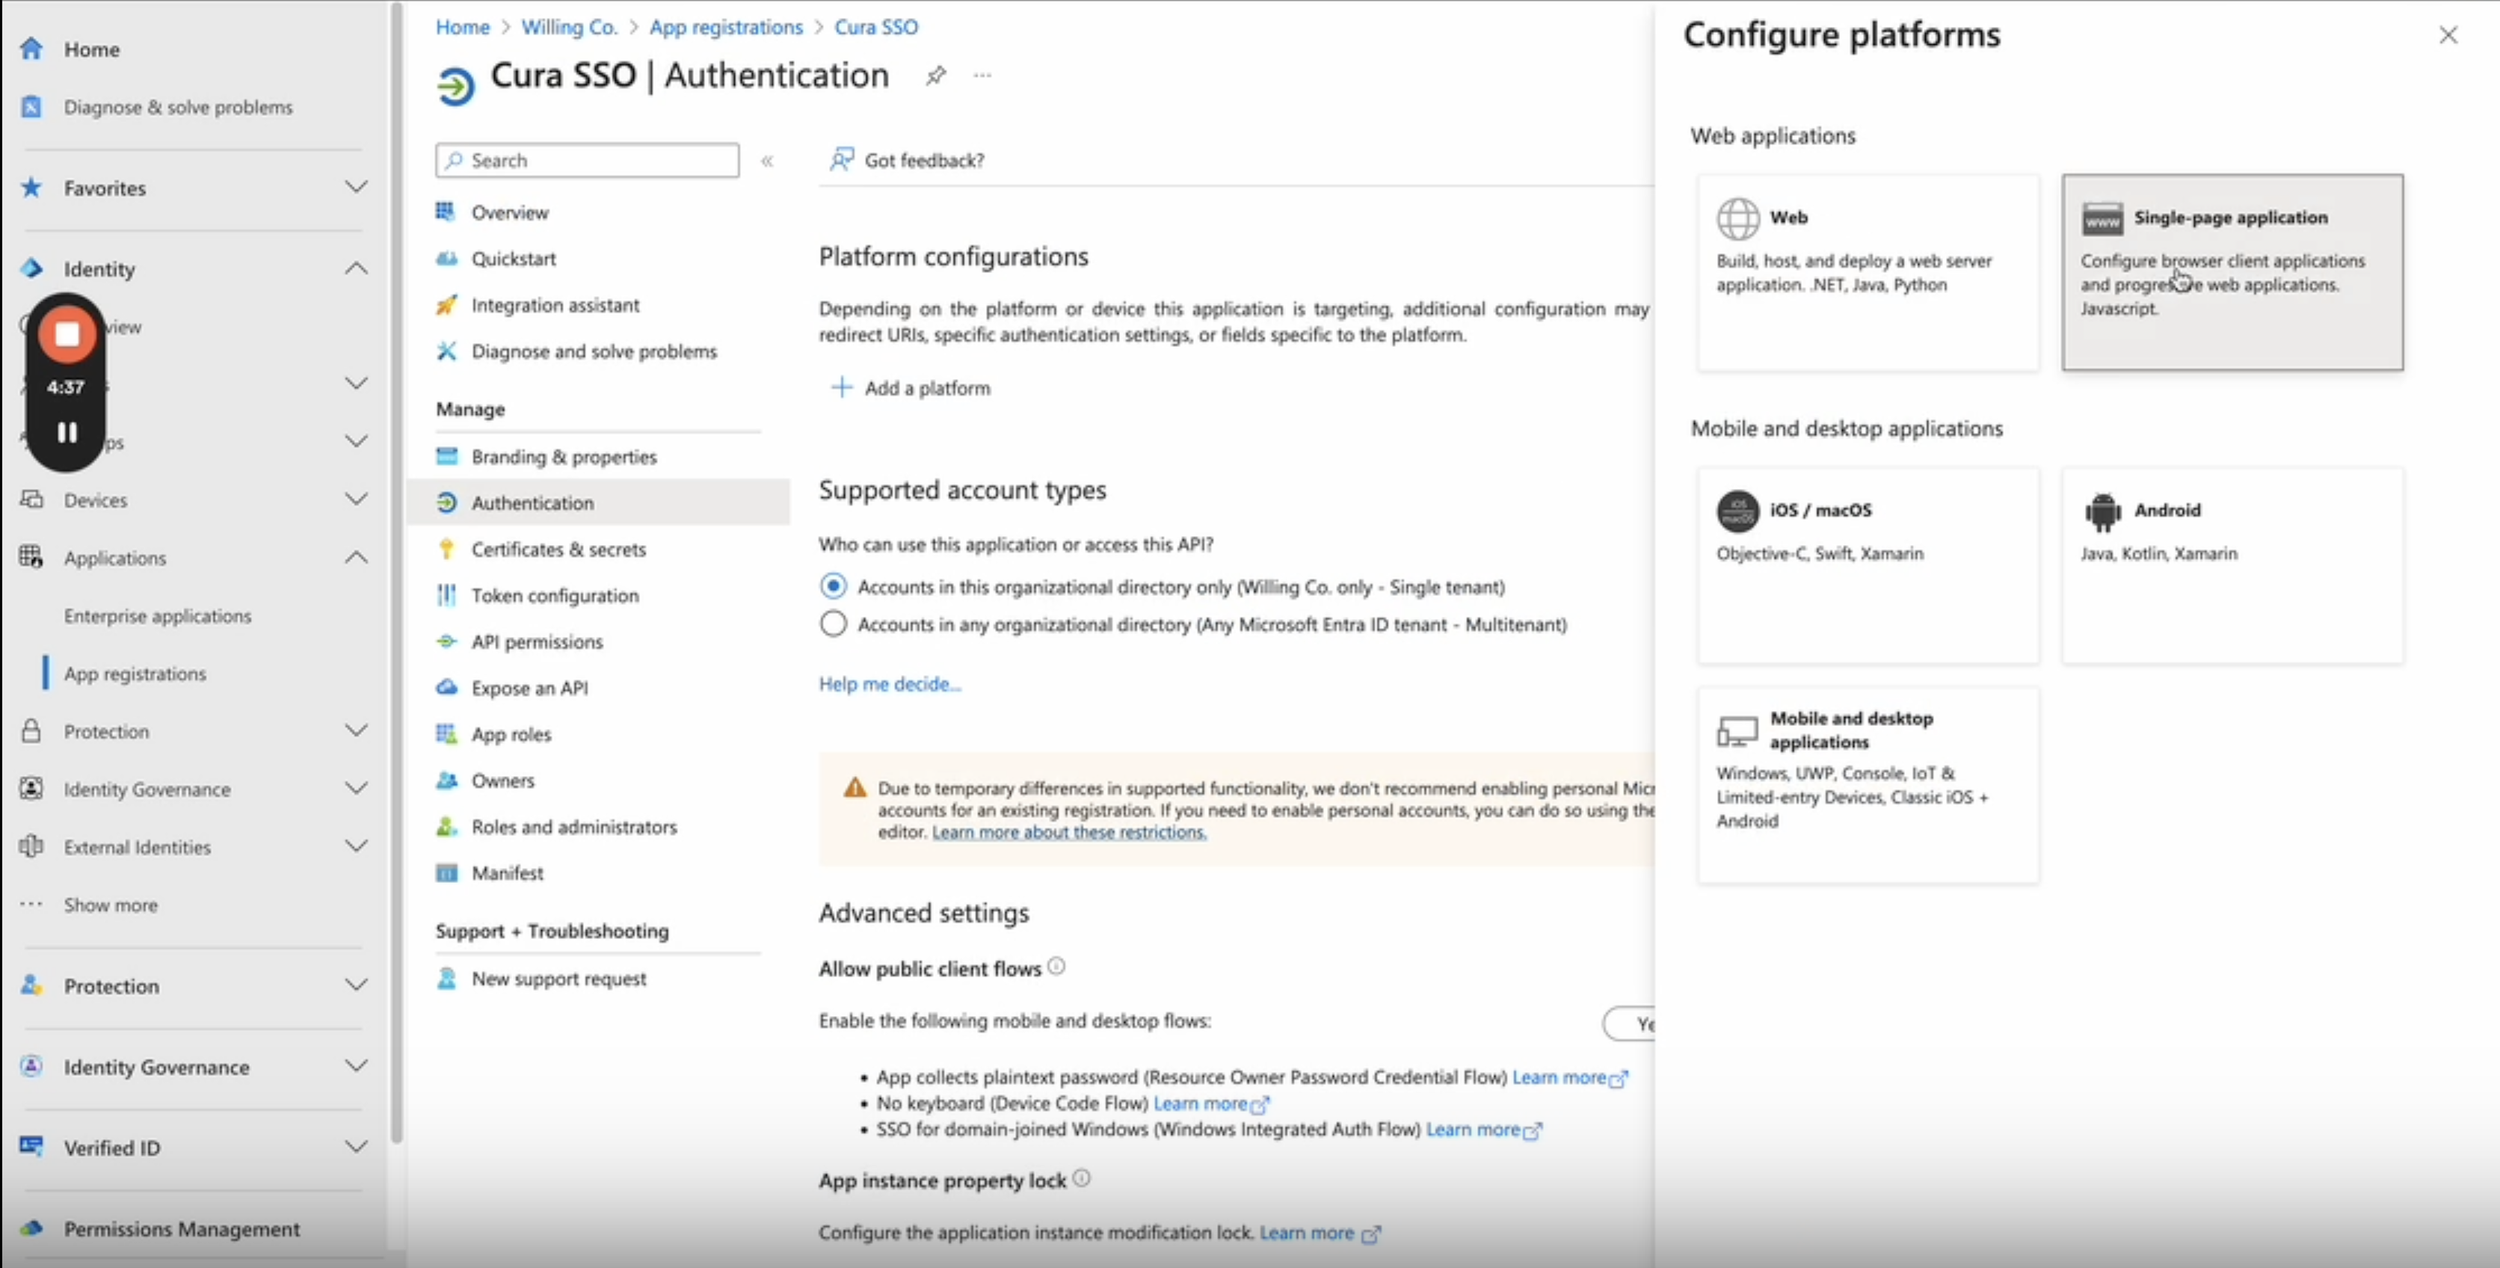
Step 5:
In the Redirect URIs input box, paste the link: https://platform.curaeducation.com/accounts/microsoft/login/?client-id={Your Client ID}&tenant-id={Your Tenant ID}
Please replace the client-id and tenant-id with the information in Step 3.
Once done, click Configure. Here’s an example: https://platform.curaeducation.com/accounts/microsoft/login/?client-id=1530bbe4-d0f5-4ba9-adb4-527593988d40&tenant-id=24c233ed-1c9a-42a4-a0fd-69a40ed476f0

Step 6:
You should see the Single-page application successfully set-up.
Now, click on Enterprise applications on the left menu.

Step 7:
In All applications, select the Cura SSO app you have just created.

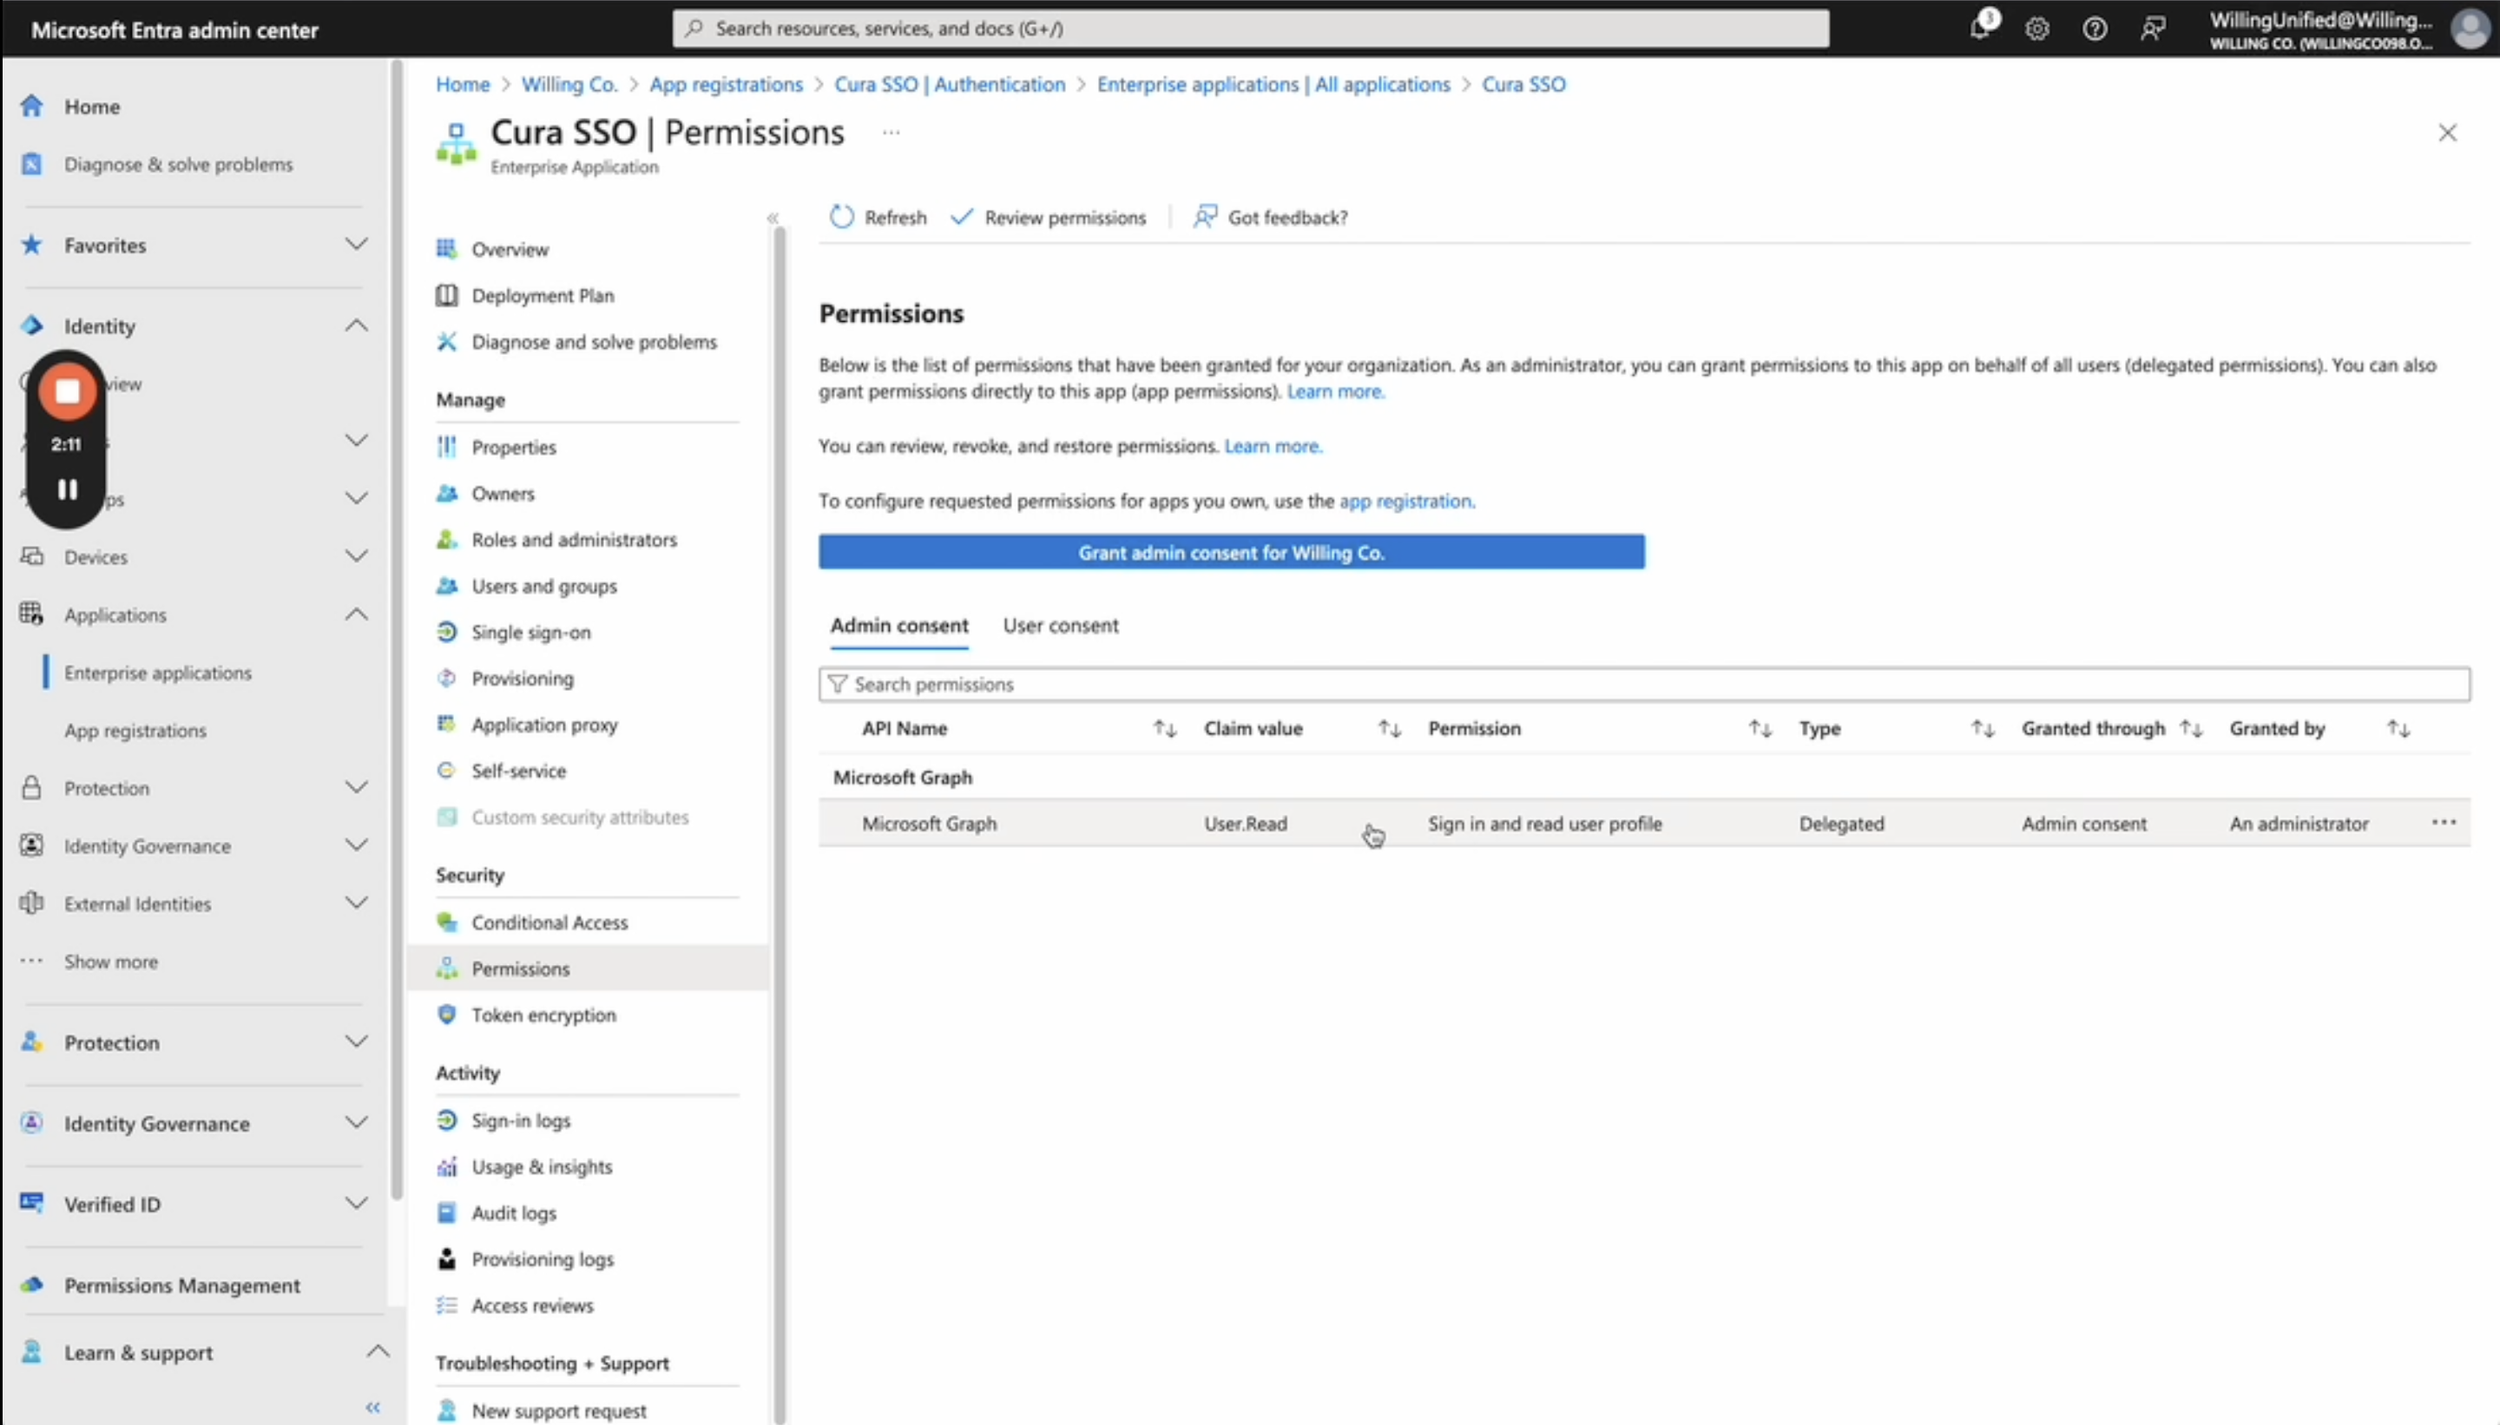
Step 8:
Click Permissions.
Then click Grant admin consent for …... to grant permissions to your organization.

Step 9:
Once the popup appears, click Accept.


Step 10:
Once you see the User.Read value in Admin consent, please email us at support@curaeducation.com to confirm.
After receiving your confirmation, we will finalise the connection and begin testing.